How to set up a Virtual Machine with VirtualBox

So you’ve heard of virtual machines and want to dip your toes in this new world without complicated, IT-savant and complex tutorials? VirtualBox is the answer to your prayers. Originally developed by Sun Microsystems and now supported by Oracle, VirtualBox has always been the solution for small setups or testing purposes, hence pretty popular among first-timers.
Virtual Machines
If you haven’t heard this word before, you’ve probably been sleeping a deep slumber; this paragraph will explain briefly what a virtual machine is, if you already know that, just skip to the practice! A virtual machine can be easily explained like one (or more) operating system(s) running on the top of another operating system. The base operating system is then called the host while the virtualized operating system becomes a guest. The host will continue to function even with one or more guests running, and each one will be like a different machine. However, guests are not really machines, hence the name “virtual machine“. Each guest can have a number of CPU (cores), RAM and Storage (limited by the physical host) reserved, so that each virtual machine will not consume the whole physical host. Virtual machines have been largely employed at enterprise-level and also in SMBs/SOHOs. In the past each service (web, mail etc.) used to require a different physical server, however that service usually wasn’t enough to use the whole server, hence much CPU/RAM remained unused. Also this led to high costs when buying for the first time and when replacing. It was then that Virtual Machines popped up, creating a real revolution in the industry. Today they are almost always present in every medium-large scale business. Also they are used to test new Linux distributions or to isolate development environments, leading to a crescent interest in above-average users.
Set up VirtualBox
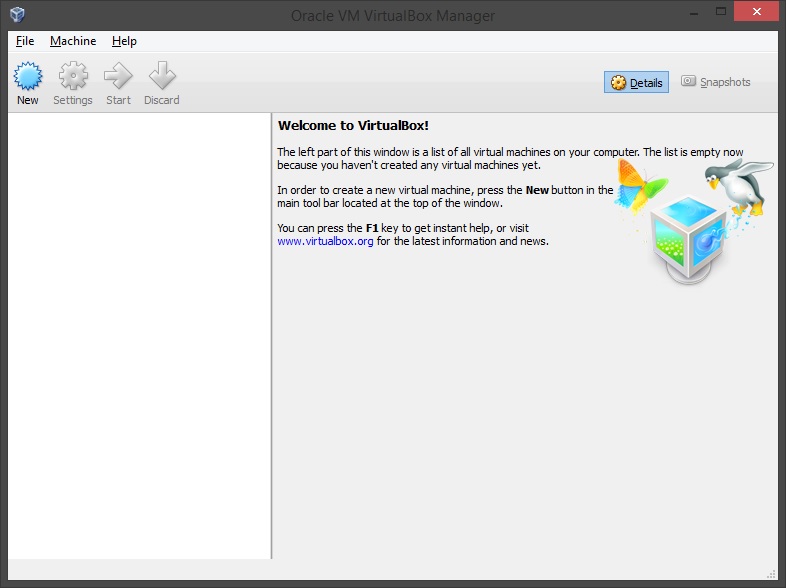
The first thing to do to get started is download VirtualBox. Once you got the right version for your operating system/architecture, install it (the installation process is trivial and will not be explained here.) If everything was done correctly you will face the following screen:
Create a new Virtual Machine
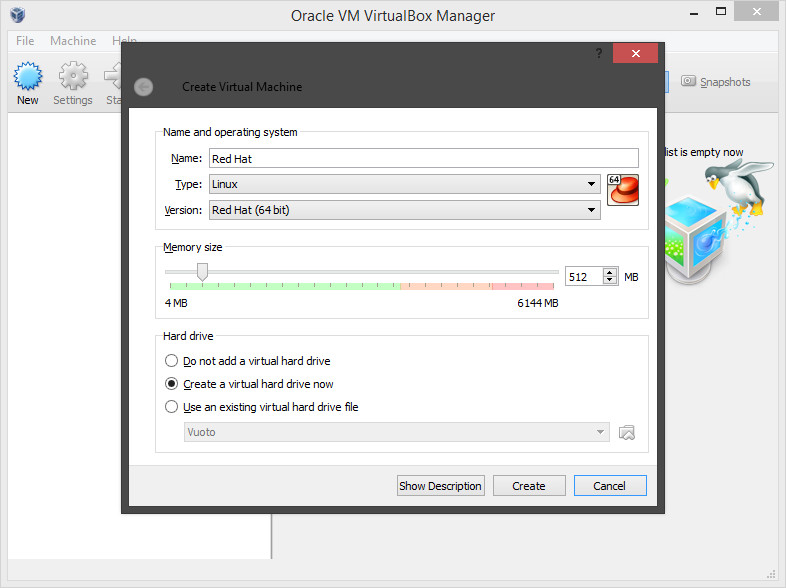
Just click on New to start the procedure, in this way you will start the wizard to configure your very first Virtual Machine.
In this screen I’m configuring a Red Hat (CentOS) Virtual Machine with 512MB of RAM (CPU cores can be specified only after creation). I’m also creating a new Virtual Hard Drive (VHD) (a file that emulates the hard drive, after setting the first you can set multiple afterwards). Click on create to proceed.
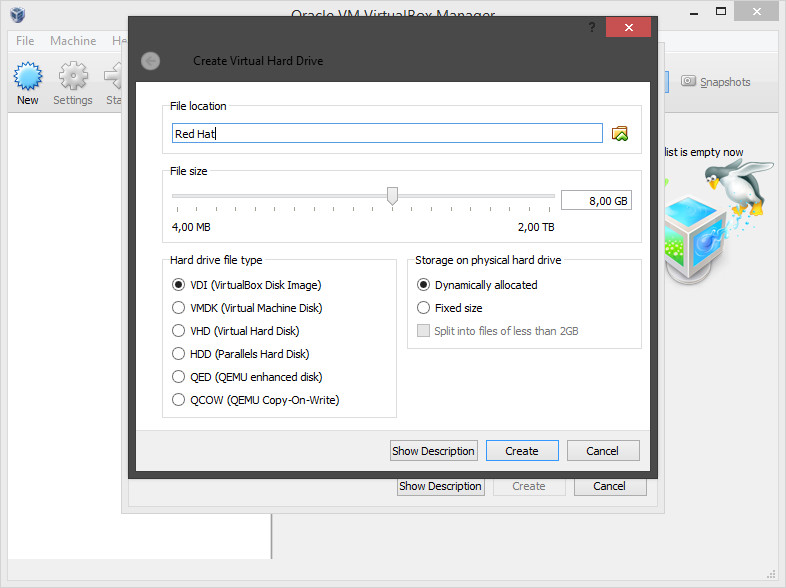
In this step I’m creating a Virtual Hard Drive named “Red Hat.vdi” large 8GB. You can also choose the container format of the VHD as well as the allocation method (fixed/dynamic). If you don’t really know what you are doing VDI format will do the job.
The first boot
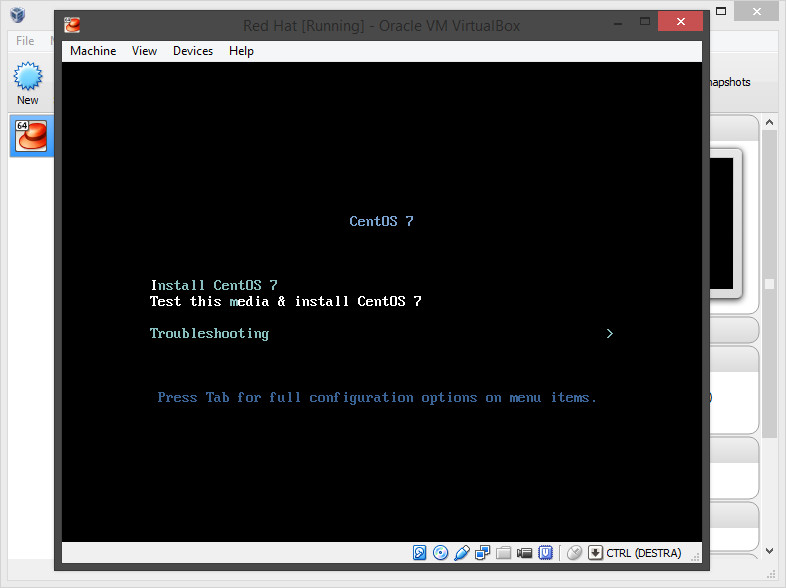
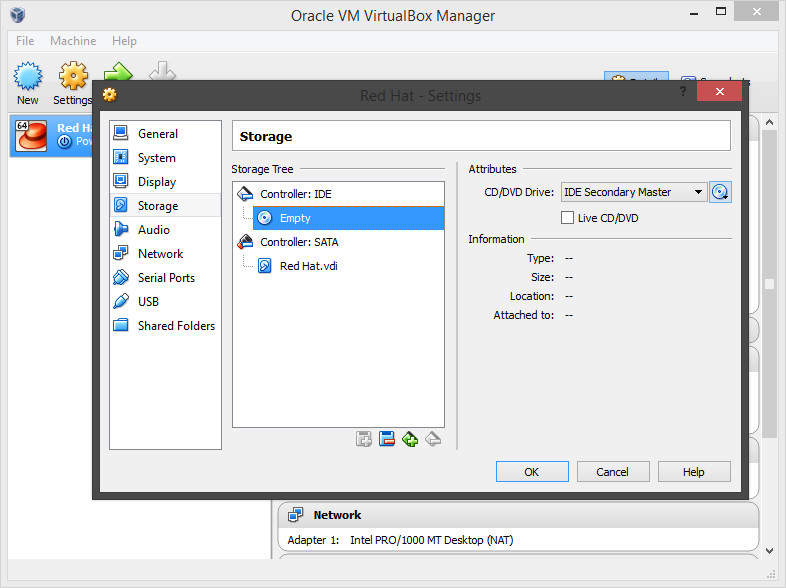 Now that everything is in place, don’t you notice something is missing? Where do the operating system come from? Of course VirtualBox won’t download it for you, so you will have to download it. Once done, click on the virtual machine, then click on settings, go to storage and click on empty under “Controller: IDE“, finally, click on the disk shown in figure. This will allow you to select the image of the operating system you want. Done? Click OK and then Start in the upper bar and if a window isn’t opened, double-click on the virtual machine in the list… and voilà! You have your very first running Virtual Machine.
Now that everything is done, you can install the operating system like you are used to, and use it like it is a real one. You may also want to practice and briefly look inside settings. Also, remember to shut down your virtual machine properly (either inside the guest operating system, or through VirtualBox upper bar).
In the end, you now know how to install, configure and run in a basic way a VirtualBox-based Virtual Machine. However, keep in mind this method is really basic, and in enterprises other solutions like KVM or VMWare are used instead.
Image courtesy of Robert
- 2020 A year in review for Marksei.com - 30 December 2020
- Red Hat pulls the kill switch on CentOS - 16 December 2020
- OpenZFS 2.0 released: unified ZFS for Linux and BSD - 9 December 2020



Recent Comments