How to create a Linux bootable USB/CD on Windows

So you’ve read of Linux advantages throughout this blog or you’ve heard of it from a friend, and now want to try it or just install it on the spot. Great choice! But first things first: to perform an installation or just try Linux without touching your beloved computer you first have to create a bootable support to run it from.
Choosing a Linux distribution
The first choice you have to make in order to try/install Linux is choosing a distribution. I’ll speak more accurately of this choice in another article, however you have to choose now. Though the real choice is hard given the number of Linux distribution out there, if you are a beginner I suggest you to start from one of these:
- Ubuntu desktop: Ubuntu is probably the distribution that changed Linux, positively or negatively, depending on whom you ask. It is in my humble opinion the best fit for a beginner. You will find yourself at home and overall it is pretty polished.
- Linux Mint: Mint has grown since its first release, today it is one of the most used Linux distributions. Its users praise the elegance and the non-free software (like Flash) that comes along with this distribution.
- Fedora Workstation: This one is for the ones who like to experiment. In the three this is the less user-friendly but it comes with the latest updates and is the most “free” of the three.
Choosing a support
The second choice you have to take in order to try/install Linux is where you’re going to create the live media. The live media is a copy of the Linux Distribution you chose in the precedent step. You have many choices but the ones indicated for beginners are:
- CD/DVD: This one has been the main choices for many years. In this case you just have to burn the image of one of the distributions onto your CD/DVD with your favourite program. The choice between CD or DVD depends on the size of the image.
- USB: This is the option trending since about five years. In this case you’ll need a dedicated program to flash the image onto the USB. You’ll have two choices: UNetbootin or Universal USB Installer. Of the two I suggest and cover the latter.
Universal USB Installer
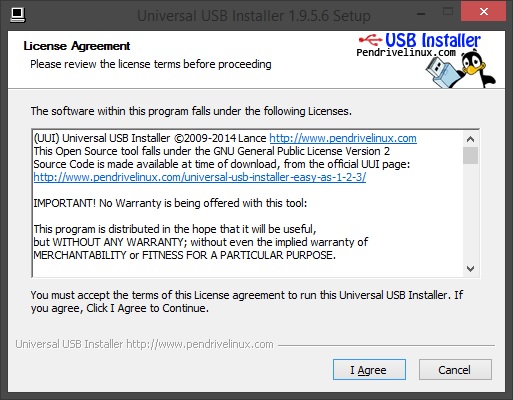
This is the first screen you’ll face once you run the stand-alone program. You don’t need to install anything: just click I Agree.
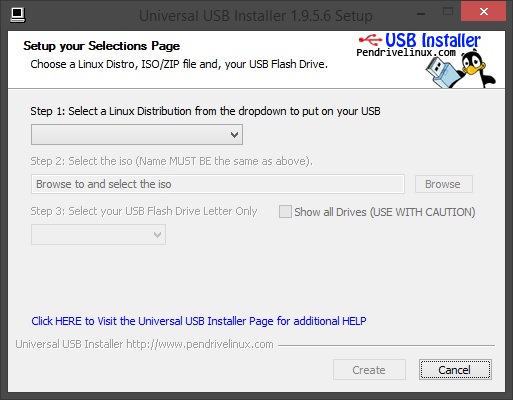
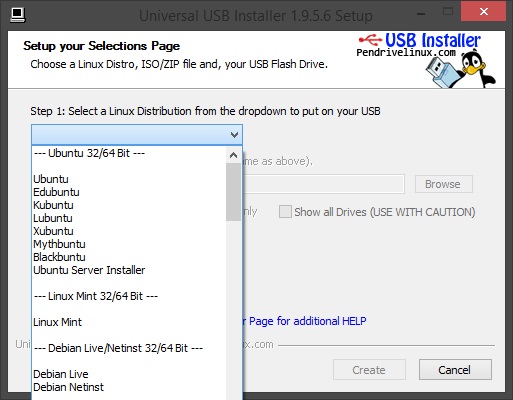
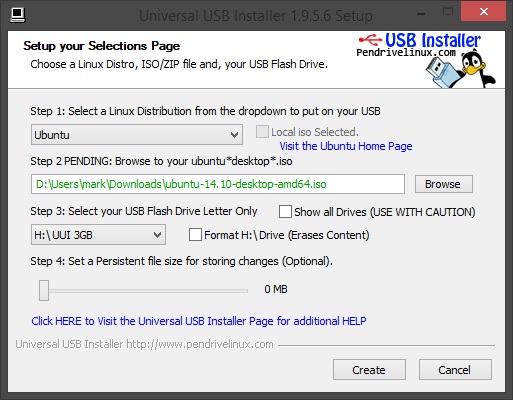
In this step you have to select the distribution you chose from the drop-down list. You have a wide choice but we discussed earlier which one to pick.
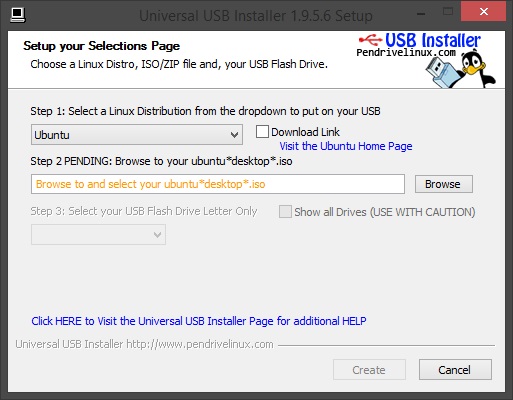
Now you can do one of two things:
- Download automatically: check Download Link and wait until it finishes.
- Download manually: and select browse to point to the image.
Once you have finished selecting/downloading the image the last step is selecting the USB device to use in the process. If you want you can select the format option to perform a format of the device.
Beware: If there is not enough space on the device or if you select the format option, your device will be formatted (you will however get a confirmation dialogue) and you may lose important data. I take no responsibility for what you do following this tutorial!
Everything done? Click Create and wait. Now you have your live media and you are ready to use it to boot Linux :)
Image courtesy of David Junyent. And to tell the truth, that is a mouse, not a disk :P.
- 2020 A year in review for Marksei.com - 30 December 2020
- Red Hat pulls the kill switch on CentOS - 16 December 2020
- OpenZFS 2.0 released: unified ZFS for Linux and BSD - 9 December 2020




Recent Comments